Save form attachments to share point using power automate(Flow)
- kriSHna

- Aug 19, 2020
- 3 min read
When we design forms we always want to store the responses in a data source so that we can use them for evaluation on a later date.
The same way if the MS Form contains file upload action we also want to store the files that were uploaded to the form back to share point so that we can utilize then in building power automate flows or power apps.
In this blog post, we will learn steps for creating a flow to save the files that were uploaded on an MS Form to a share point list/document library.
Step 1: Open power automate home page --> Click on create and select "Automated from blank" and create a button to create a new flow.

Step 2: After clicking on create you will be navigated to flow, editor, here in for trigger action search "When a new response is submitted"this will help us in triggering the flow whenever a new response is submitted for the selected form.

Once the trigger step has been added, select the form on which you want the flow to track responses
Step 3: Click on "+ New Step" to add another action. Add "Get response details" action this will help us in exacting the response details that a user has entered while filling the form.

Step 4: Once the "Get response details" step has been configured add an action "parse JSON" to exact information coming from the previous step.
The "parse JSON" step will require two parameters to run content, the schema in the content field pass the file upload action's dynamic content coming from the "Get response details" step.

You will be able to see questions in the dynamic content selection, click on the question for which you have configured the file upload event this taken as content.
For the schema step, copy-paste the content provided below.
{
 "type": "array",
 "items": {
 "type": "object",
 "properties": {
 "name": {
 "type": "string"
            },
 "link": {
 "type": "string"
            },
 "id": {
 "type": "string"
            },
 "type": {},
 "size": {
 "type": "integer"
            },
 "referenceId": {
 "type": "string"
            },
 "driveId": {
 "type": "string"
            },
 "status": {
 "type": "integer"
            },
 "uploadSessionUrl": {}
        },
 "required": [
 "name",
 "link",
 "id",
 "type",
 "size",
 "referenceId",
 "driveId",
 "status",
 "uploadSessionUrl"
        ]
    }
}
Step 5: Add a compose action to the file and add below expression to the compose action using the expression tab.
body('Parse_JSON')[0]['name']
This will help us to retrieve only the name-value from the array output for file upload in MS Forms.
Step 6: In this step, we will add one drive for business action for extracting the file content from the files that were uploaded to the form.
When we add file upload action to the form a new folder will be created in one drive for storing the files, we will extract file content from there. You will be able to see a folder called Apps and once you starting navigating into that you will be able to see all the subfolders.

You can manually add the path by typing the content in the file path, below I am sharing a sample path. Please ensure you start with "/" as path always has a root folder and inside that, all other folders are included.
/Apps/Microsoft Forms/Testing for fileupload(PA)/Question/
After adding the path value, in the end we will share the filename by adding the expression
body('Parse_JSON')[0]['name']Once everything is done the content inside the path will look as below, where we have text followed by the expression to capture file name.
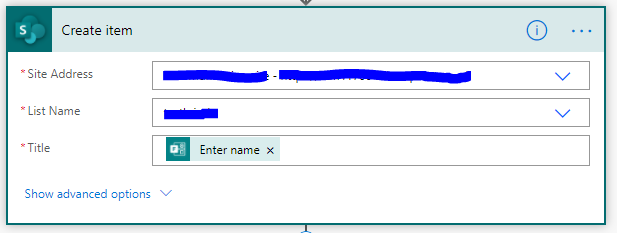
Step 7: Now, we will add SharePoint "CREATE ITEM" to store the responses into SharePoint. Create columns in SharePoint list so that you will be able to map each response with the right column.

Step 8: We will add action to add files as an attachment to the list item that we have created in the above step.
Populate the list name and you can select the ID value coming from the "CREATE ITEM" step, in the file name field add the body expression that has been shared above to get the file name, in file content step add the file content coming from the one drive.

Once we have the flow setup you will be able to see that whenever you submit a response the data is getting stored in the resulting share point list and also the uploaded files are getting added as attachments for the same.
This approach is more helpful when you have invoice approval forms where you want the user to upload files and based on that the approval will be processed.
You can see in below video the flow working in action.
Please feel free to submit any feedback/issues that you have faced in implementing the above approach. Share it with others if you feel it helpful.


Comments